Select

Graphic Tee

Backpack
Product


AI Model

Indoor

Outdoor
Background

Create pro-quality images and videos at scale with AI! Faster, cheaper, and tailored to your ecommerce brand. From just $2/image!
*No Credit Card Required
3x Session Time
4x Click-Through Rate
2x Conversion Uplift


Ecommerce brands are turning to these 3 AI-powered upgrades to drive conversions across PDPs, ads, and collection pages. Starting at $2/image!
Swap dull backdrops with AI-generated lifestyle scenes
Turn catalog images into short-form videos with text overlays and music
Automatically pull key product specs from your PDP and stitch them into your videos

The Shoot Show Nobody Talks About

Takes weeks to plan

Burns your Budget

Hard to find diversity

Managing logistics is chaos
Close to
Up to
near
near
From product link to studio-quality content. That’s it.

Step 1
Enter your product listing URL. Our Al will gather all the details, images, and Specs from the Page.
Step 2
Pick from lifestyle backdrops, overlays , or Al models. Match your brand vibe without lifting a camera.
Step 3
Preview your AI-generated creatives, tweak backgrounds or formats, and download instantly or save as your Unique Template.
Your next catalog update doesn’t need a shoot, a crew, or a month-long turnaround. With Whatmore, you get studio-quality visuals in minutes and scale across every SKU.

Generate product images from $2/image. No studios, models, or gear required.

Pay $300-$500 per SKU for a full shoot — plus editing and setup fees.

Create PDP, lifestyle, and banner-ready images in minutes for 100+ SKUs.

Wait days or weeks for production teams to deliver each visual asset.

Swap backgrounds, models, or formats instantly — no reshoot needed.

Need an entirely new shoot to test different setups or campaign variations.


In the digital marketplace, your product photos are your storefront windows. They create that crucial first impression and can make or break a sale in seconds. High-quality ecommerce product photography isn't just about making items look attractive - it's a powerful sales tool that drives revenue and builds trust with potential customers.
Think about your own online shopping habits. Would you purchase a product with blurry, poorly lit images? Probably not. Professional product photography speaks volumes about your brand's credibility and attention to detail.
But here's the challenge many online retailers face: creating stunning product visuals consistently can be:
The good news? You don't need a professional studio or years of photography experience to create compelling product images. With the right strategies and tools, you can streamline your product photography workflow while boosting your bottom line.
This guide reveals practical photography hacks that help you:
Ready to transform your product photography game? Let's explore proven techniques that combine quality with efficiency to drive more sales for your online store.
In today's digital marketplace, product photography serves as your store's virtual storefront. Recent studies reveal compelling statistics about visual content's impact on online shopping behavior:
High-quality product photography builds instant credibility for your brand. When customers see professional, well-lit images showcasing your products from multiple angles, they're more likely to trust your business and complete their purchase. This trust translates directly into improved conversion rates - businesses report up to 40% increase in sales after upgrading their product photography.
Professional product images also play a crucial role in managing customer expectations and reducing return rates. Clear, detailed photos that accurately represent your products help customers:
The impact of quality product photography extends beyond immediate sales. Strong visual content:
Research shows that online stores with high-quality product images see a 27% lower return rate compared to those with basic or poor-quality photos. This reduction in returns directly impacts your bottom line by:
The investment in professional product photography creates a ripple effect across your entire ecommerce operation. Stores that prioritize visual content consistently outperform competitors in key metrics like average order value, customer retention, and brand recognition.
Traditional ecommerce photography presents significant hurdles that can strain resources and slow down your product launches. Let's explore these key challenges:
These challenges create bottlenecks in your product launch timeline and impact your ability to respond quickly to market demands. The traditional photography process can take weeks or even months from concept to final delivery, affecting your marketing agility and competitive edge in the fast-paced ecommerce landscape.
The world of ecommerce product photography has been changed by Whatmore Studio's AI-driven content engine. This innovative platform makes it easy to create professional-quality images directly from product URLs, eliminating the need for complicated photoshoots.
The platform's automated visual generation system creates studio-quality images and videos within minutes. D2C brands can now produce consistent, high-converting content without coordinating multiple photoshoot elements or waiting weeks for final deliverables.
Whatmore Studio's ecommerce content engine serves marketing teams seeking efficiency and scale. The platform's technology maintains professional standards while reducing production time from weeks to minutes. This rapid turnaround enables brands to respond quickly to market trends and maintain fresh visual content across all channels.
The system's ability to generate diverse visual content helps brands connect with different audience segments through representative imagery. Each generated visual maintains brand consistency while offering unique perspectives that drive engagement and conversions.
Ready to transform your product photography game? These proven hacks will streamline your workflow and deliver professional results that drive sales.
White backgrounds are the gold standard in ecommerce product photography - and for good reasons. A clean white backdrop creates a professional, distraction-free environment that puts your products center stage.
A white background setup pays dividends through faster shooting sessions, simplified editing, and versatile final images. This standardized approach creates a professional look while reducing production time and costs.
Want to take your white background shots to the next level? Consider investing in:
These tools help create consistent, high-quality white background photos that meet marketplace requirements and showcase your products effectively.
Lighting can make or break your product photos. Let's explore some proven lighting techniques that can help you achieve professional results without spending a fortune.
Your basic lighting kit should include:
Natural light works best during mid-morning or late afternoon. Place a white foam board opposite your window to reflect light and fill shadows. For artificial setups, start with a three-point lighting system: main light, fill light, and backlight.
Remember to maintain consistent lighting settings across your product catalog. Document your successful setups with photos and notes - this saves time when shooting similar items later.
A well-planned lighting setup transforms amateur shots into professional-grade photos that drive sales. The initial investment in quality lighting equipment pays off through higher conversion rates and reduced need for extensive post-processing.
A stable camera setup makes the difference between professional-looking product photos and amateur snapshots. Tripods serve as your reliable third hand, eliminating camera shake and ensuring crystal-clear images that capture every product detail.
Key Benefits of Using Tripods for ecommerce product photography:
Your tripod setup directly impacts your workflow efficiency. A quality tripod with a ball head mount lets you swiftly adjust camera angles while maintaining stability. This feature proves invaluable when photographing products from multiple perspectives.
Workflow Enhancement Tips for ecommerce product photography:
The stability provided by tripods also enables advanced techniques like focus stacking - capturing multiple shots at different focus points to create one ultra-sharp image. This technique particularly benefits close-up shots of jewelry, textiles, or intricate product details.
A stable camera setup reduces the number of rejected shots due to blur or inconsistent framing. You'll spend less time retaking photos and more time focusing on creative aspects of your product photography. This efficiency translates directly into faster turnaround times and higher-quality deliverables for your ecommerce store.
Product preparation is a critical step that can make or break your ecommerce product photography results. A well-prepped product saves hours in post-production and creates a professional impression right from the start.
A clean, well-prepared product creates trust with potential buyers and reduces the need for extensive retouching. Invest time in proper preparation to capture the true quality of your products and streamline your photography workflow.
Consider creating a preparation checklist specific to each product category. This systematic approach ensures consistent quality across your entire product catalog and helps train new team members on proper handling procedures.
Props and lifestyle elements can make your product photos more interesting and persuasive, leading to more sales. By carefully choosing props, you can create genuine scenes that resonate with your target audience.
Here are some tips on how to use props effectively:
Your choice of props should convey the lifestyle of your ideal customer. For example, if you're targeting sophisticated professionals, you might photograph a luxury watch alongside leather accessories and premium stationery. On the other hand, if your audience consists of fitness enthusiasts, you could pair athletic wear with yoga mats and water bottles.
In addition to using props, here are some techniques for capturing lifestyle photos that showcase your products:
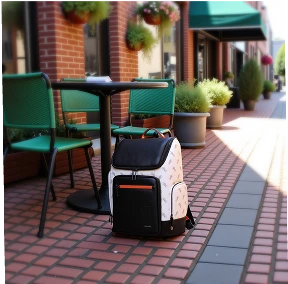
By depicting products in real-life scenarios, you help customers imagine how they would use them in their own lives. For instance, a coffee mug placed in a cozy morning scene with newspapers and pastries evokes emotional connections. Similarly, a backpack photographed in outdoor settings highlights its practical applications.
Here are some quick prop ideas based on different product categories:
Remember to maintain consistency in prop styling across your product line. This builds a cohesive brand story that customers can instantly recognize and connect with.
Your product's story unfolds through every angle and detail you capture. Multi-angle photography gives customers a complete view of what they're buying, reducing uncertainty and boosting purchase confidence.
A systematic approach to multi-angle photography creates a professional presentation that drives sales. Set up your shots in a clockwise rotation, maintaining consistent distance and lighting for each angle. This method speeds up your workflow and ensures you don't miss crucial perspectives.
Close-up photography requires specific techniques for crystal-clear results:
These detailed shots serve as virtual "touch points" for customers who can't physically handle the product. When you showcase fine details and textures, you're not just selling a product - you're creating an immersive shopping experience that builds trust and drives conversion rates.
Remember to maintain consistent styling and composition across all angles. This cohesive approach strengthens your brand presentation and simplifies the editing process later.
Your ecommerce product photography journey doesn't end with the camera click. Post-production transforms good photos into exceptional ones that drive sales and engagement. Let's explore the essential tools and techniques to enhance your product images efficiently.
Pro Tip: Invest time in learning keyboard shortcuts and creating custom presets. These small efficiency gains compound into significant time savings across large product catalogs.
Image size directly impacts your ecommerce site's loading speed - a critical factor in customer retention and SEO rankings. Studies show that 40% of users abandon websites that take longer than 3 seconds to load.
Here's how to optimize your product images for peak performance:
Remember: High-quality visuals don't need massive file sizes. A well-optimized 2048x2048 product image can maintain excellent detail at 150-200KB. The key is finding the sweet spot between visual quality and loading speed.
Ecommerce product photography traditionally involves high costs and logistical challenges, but Whatmore revolutionizes this process with AI-driven solutions. It enables online sellers to generate professional, lifestyle-ready product images quickly — all without hiring photographers or managing physical shoots.
You can start risk-free with a free plan offering 20 credits per month. For businesses with larger catalogs, plans begin at $29/month for 120 credits, perfect for scaling brands. If you have a bigger product lineup, the Scale plan at $199/month with 800 credits or the Premium plan at $449/month with 1,800 credits provides even more flexibility. Credits apply to images, videos, and other creative assets, so you only pay for what you create, making it an efficient and cost-effective choice for ecommerce product photography.
Ready to elevate your ecommerce visuals, boost conversions, and scale faster? Start creating stunning, on-brand product photos and videos today — all powered by AI and priced from just $2/image. Experience the future of ecommerce product photography with Whatmore Studio!


